
How to Style Men's Pompadour That Holds All Day
A pompadour is not a haircut you roll out of bed wearing. It is a statement: taller in front, tighter at the sides, and fully prepared to make flat hair retreat in shame. If you’re looking up how to style mens pompadour hair, the real secret is not piling on product. It is building lift in the right order, then locking it down without making your head look like a plastic helmet.
The good news: you do not need a barber’s tool chest or a 40-minute mirror session. You need the right cut, a blow dryer, a brush or comb, and a styling product that matches your hair. Get those working together and your pompadour can survive the commute, the office, date night, and whatever else the longship brings.
Start With a Pompadour-Friendly Cut
A great style starts before you touch the blow dryer. The classic pompadour keeps noticeable length on top, usually three to six inches, with shorter sides and back. How short you go on the sides changes the attitude.
A fade gives the style a cleaner, sharper contrast and makes the height on top look more dramatic. A scissor-cut taper is softer and more traditional, which works well if you want a pompadour that feels polished rather than aggressively sculpted. If your hair is thick, ask your barber to remove some bulk where needed. Thick hair creates excellent volume, but too much density can make it fight your brush like it owes you money.
Your front section needs enough length to rise and sweep backward. If it is too short, you will spend every morning trying to build a wave with nothing but optimism. If it is very long, it may fall backward or split apart unless you use stronger hold and more controlled drying.
How to Style a Men's Pompadour From Damp Hair
A pompadour works best when you begin with freshly washed or evenly damp hair. Not soaking wet. Not bone dry. Think towel-dried until your hair is damp enough to reshape but not dripping onto your shirt like you just escaped a fjord.
Start by working a small amount of pre-styler or lightweight cream through your hair, concentrating on the roots and the longer top section. This gives the dryer something to activate and helps create a more natural foundation. If your hair is fine or straight, this prep step matters even more because it adds grip before you bring in heavier product.
Then use a blow dryer on medium heat and medium airflow. Aim the air from the front toward the back while lifting the front section with a vented brush, round brush, or your fingers. The direction is the whole game. You are training the hair upward first, then backward, instead of simply blasting it dry in random directions.
Keep the sides controlled as you dry. Brush them down and slightly back toward the crown so they support the shape rather than puffing out. A pompadour should look intentional from every angle. Big on top with balloon sides is less classic cool and more startled cartoon character.
Once the front has height, switch the dryer to cool air for 10 to 15 seconds. This helps set the shape. Hair is easier to mold while warm, but cooling it in position gives your work a better chance of lasting past noon.
Use Your Brush Like It Has a Job
For a classic, smooth pompadour, a round brush creates the most polished lift. Roll the front hair backward as you dry, keeping light tension on the section. This makes a rounded, controlled crest rather than a sharp spike.
For a looser modern pompadour, use a vented brush or your fingers. Lift at the root, pull the hair back, and let some texture stay visible. This version is less formal, easier to restyle during the day, and more forgiving if your hair naturally has a wave.
A comb is best saved for shaping and detail after drying. Trying to create all your volume with a comb while your hair is wet is a fine way to create flat, separated strands and a bad mood.
Pick the Right Product for Your Hair Type
The product you choose decides whether your pompadour looks touchable and natural or glossy and old-school. Neither is wrong. The right one depends on your hair and the finish you want.
Pomade is the traditional choice for a sleek, defined pompadour. It gives shine, control, and that clean barbershop look. Use a water-based pomade if you want easier washout and the ability to restyle with a little water. An oil-based formula usually offers more classic shine and flexibility, but it takes more effort to wash out and can feel too heavy on finer hair.
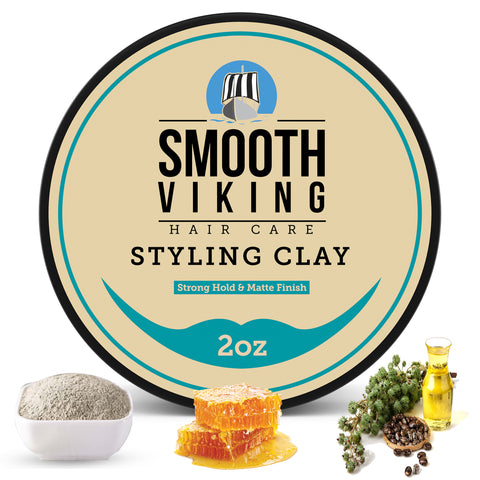
Styling clay is the move for a matte or low-shine finish with serious grip. It is especially useful for thick, stubborn, or textured hair that wants to expand sideways instead of standing tall. Clay can make a pompadour look more current and less like you are headed to a 1950s dance hall. The trade-off is that too much can make your hair dry-looking or hard to run your fingers through.
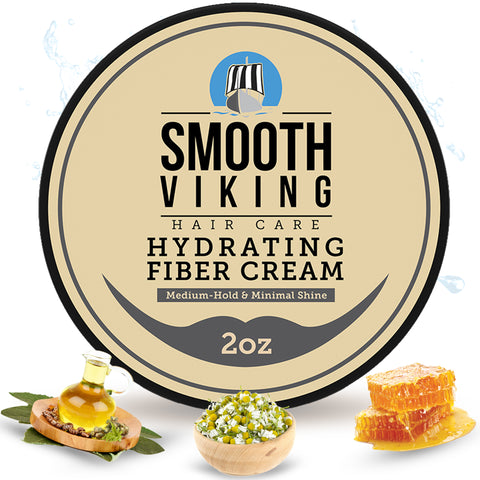
Fiber cream sits in the middle. It adds definition and a natural finish without the stiffness of some clays or the shine of traditional pomade. It is a solid choice for a relaxed pompadour, medium-length hair, or guys who want control without looking overly styled.
Whatever you use, begin with less than you think you need. Warm a dime-sized amount between your palms until it spreads evenly, then work it from back to front. Starting at the back prevents the front from getting overloaded, which is where most pompadours go flat, greasy, or both.
Smooth Viking Hair Styling Clay is a strong option when your hair needs a firm hold and a matte finish that still looks like hair, not construction adhesive. Use it sparingly, build only if needed, and let the volume you created with the dryer do the heavy lifting.
Shape the Front Without Crushing the Volume
After applying product, use your fingers to bring the top up and back again. Then refine the outer layer with a comb or brush. The goal is to keep the roots elevated while smoothing the surface. Pressing everything flat from the front will erase the lift you just earned.
For a traditional pompadour, comb the hair back in one connected sweep, with a soft roll at the front. The silhouette should rise gradually from the hairline and flow into the crown. If you want more rock-and-roll energy, create a higher front and a tighter sweep through the middle.
For a modern textured version, avoid combing every strand into submission. Pinch small sections with your fingers, especially near the front and crown, to create separation. Keep the general direction back, but let the texture show. Clean sides plus controlled mess on top is a good fight to win.
If the front keeps collapsing, do not immediately add another fistful of product. Re-wet only the front roots slightly, blow-dry them upward and back again, then add a tiny amount of product. Most failed pompadours need more root lift, not more goo.
Make It Last Through Real Life
Humidity, hats, workouts, and the innocent act of touching your hair can all challenge a pompadour. A high-hold product helps, but the best defense is proper drying. Product on damp hair without heat can work for some relaxed styles, but it rarely gives a tall pompadour the foundation it needs.
If you need extra insurance, use a light mist of hairspray after the final shape is in place. Hold it at arm’s length and apply just enough to support the front. Spraying too close creates stiff patches and makes your style look like it is bracing for impact.
Carry a small comb if you wear a polished pompadour. A quick pass through the front after a windy walk can bring it back to life. For clay or cream styles, your hands are usually enough. Warm the product already in your hair with your fingertips, lift the roots, and reset the shape.
Common Pompadour Problems, Fixed
If your pompadour falls flat, your hair may be too wet when product goes in, your dryer technique may be too gentle, or your product may be too heavy. Dry the roots with more upward tension and use a lighter pre-styler before your finishing product.
If it looks greasy, cut back on pomade or avoid applying it directly to the hairline. You can always add more product. Removing excess at 7:45 a.m. is a tougher campaign.
If your hair splits down the middle, dry it in the direction you want before it has time to choose its own path. A small amount of product worked into the roots can also keep stubborn part lines from reopening.
If the sides puff out, your cut may need more weight removed, but your drying direction also matters. Blow the sides down and back, then use a little product on your palms to press flyaways into place without flattening the top.
The best pompadour is not the tallest one on the block. It is the one that fits your face, your hair type, and your actual morning schedule. Build the shape with heat, choose product with purpose, and leave just enough room for it to look like you naturally have your grooming game under control.